Hitch Mount Bike Rack Installation for Beginners
The process of installing a hitch bike rack may seem daunting, especially if you have never worked with a trailer hitch before. The good news is that modern designs make installation far easier than most beginners expect. With proper preparation and a basic understanding of your vehicle, setting up a hitch bike rack becomes a straightforward task. After more than a decade of hands-on experience installing and testing racks across different vehicle types, I have found that most problems occur due to skipped steps rather than technical difficulty. Reliable brands such as CRAVOT design their racks to be beginner friendly while maintaining long-term stability.
Understanding what a hitch bike rack is and how it works
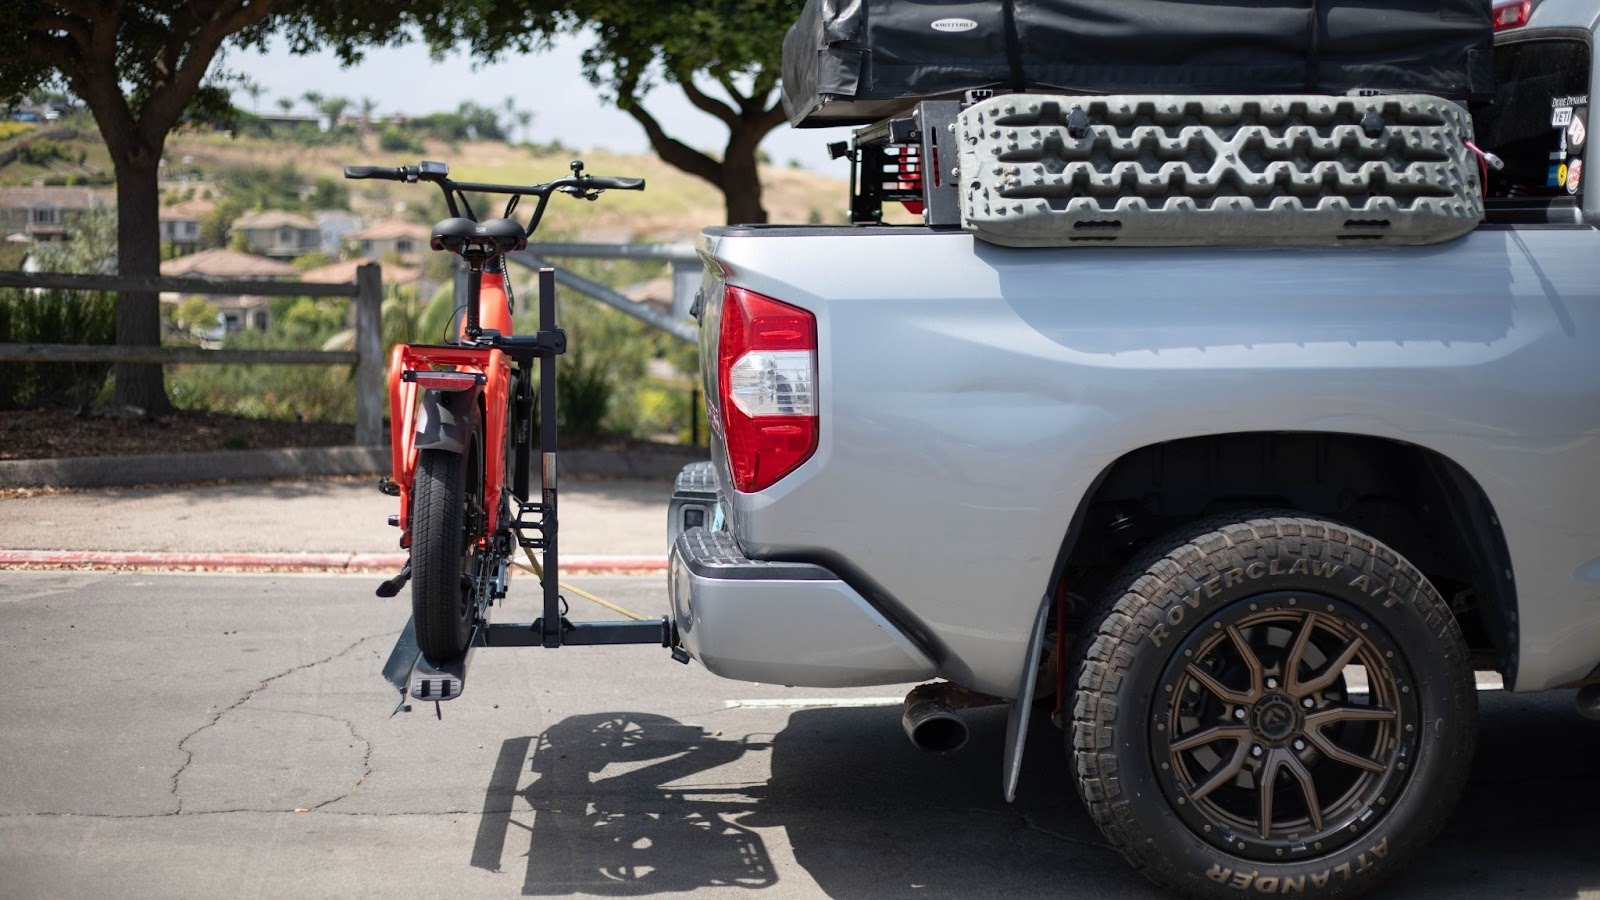
A hitch bike rack is installed in the hitch receiver of your vehicle in the same square hole used to pull towing accessories. A hitch bike rack is also low and centered unlike roof or trunk rack, which enhances balance and is easy to load. The rack is mounted with the help of a hitch pin or locking bolt and in most cases it has an anti wobble system that clamps the rack to the receiver walls to ensure that there is no movement.
This design is best when the beginner is involved since it does not use straps and hooks as used in other designs that would need to be repositioned many times.
Checking vehicle compatibility before installation
Wireless Before installing a hitch mount bike rack, make sure that your car is prepared to receive one.
Hitch receiver size and class
The majority of passenger cars have a 1.25 inch or 2 inch hitch receiver. The size is also important since the receiver should be matched with the rack shank. Adapters are included in some racks, however, the most stable is to use the right size. Class I and Class II hitches tend to carry lighter loads whereas Class III hitches can carry heavier racks and a variety of bikes more comfortably.
Weight limits and clearance
Test the tongue weight rating of your vehicle that is the maximum amount of vertical load that the hitch can support. Take the weight of the rack and all the bikes and make sure you are not over the limit. Also ensure that there is sufficient clearance on the ground particularly in the event that your driveway or your local roads involve steep inclinations.
Unboxing and preparing your CRAVOT hitch bike rack
Installation Prepare all parts on a work surface. This assists you in recognizing parts and nothing can be forgotten. Most of the CRAVOT hitch mount bike rack packages are equipped with the rack assembly, hitch pin or lock, anti wobble hardware, straps, and simple tools or instructions.
Spend some time reading the manual. Novices tend to omit this stage, yet it will save time and avoid future errors.
Step by step hitch mount bike rack installation
Inserting the rack into the hitch receiver
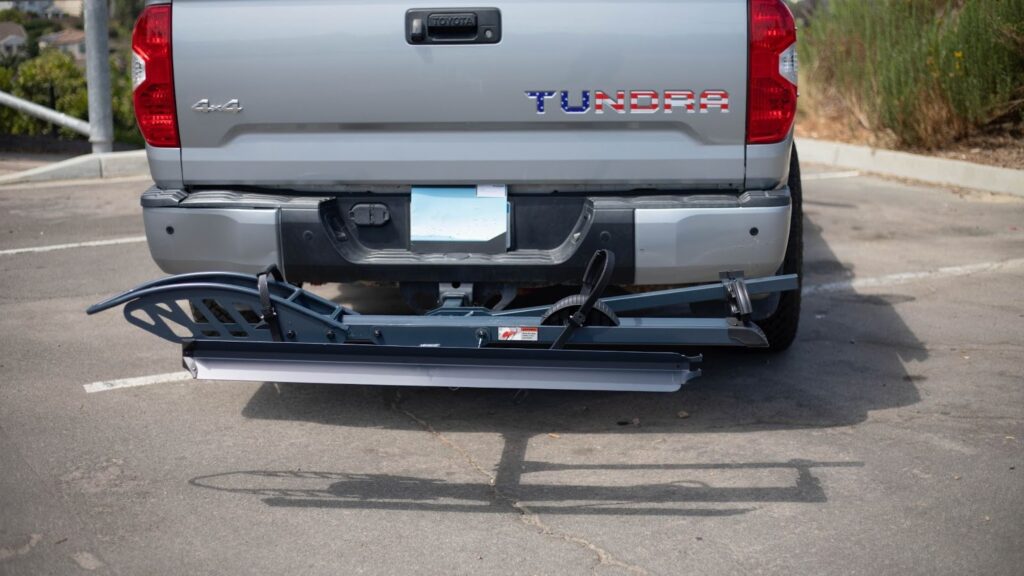
Hold the rack shank up and insert it completely into the hitch receiver until the holes of the pin line up. This might need a minor modification to fit the holes exactly depending on the type of rack design. Insert the locking bolt or hitch pin through the holes that align and lock it up as per the instructions.
The rack might continue to be loose at this point. This is usual then tightening the anti wobble system.
Tightening the anti wobble mechanism
The majority of quality hitch bike racks have an anti wobble bolt, a wedge or a cam system. Screw this part slowly until the rack is fixed firmly in place against the receiver. Do not over tighten since too much force may break the threads or bend the receiver. When shaken by hand, a well tightened rack must move very little.
Setting the rack position and tilt
Set the rack either to an upright or transport position and insert any locking levers or pin. Assuming that your rack has a tilt or swing feature, try it out now when you do not have bikes loaded. Ensure that it slides and fits well.
First time loading tips for beginners
The learning curve in bike loading is part of the installation learning curve and influences the overall stability.
Position the most weighted bike as near to the vehicle as possible hence minimizing leverage on the hitch. Switching of handlebar directions without making contacts. Fasten the wheels and frames with all the straps or arms given. Tighten in such a way that there is minimum movement, but do not overstrain the rims or frames.
Personally, it is easy to overestimate the amount of vibration that is experienced during the initial few miles. Having made a short drive, pause and re-examine all connections.
Common beginner mistakes and how to avoid them
There is the most frequent error of not tightening the anti wobble system completely. The other one is overlooking weight limits particularly in the case of electric bikes. Novices also forget to ensure that the tilt or swing lock is locked before driving.
Five additional minutes to check every action will help avoid noises, movements, and possible damages.
Safety checks before hitting the road
Check the rack before driving to ensure that the tail lights and license plates are not covered. Should it do so, it might require auxiliary lights depending on the local regulations. Make sure that the rack and the bikes do not block the exhaust systems or parking sensors.
Shake the whole set-up. When it is hard, then you are good to go.
Maintenance awareness from day one
Maintenance also begins with installation. Watch bolts, straps and moving parts. Wipe dirt and road salt off the rack. Early care will ensure that your hitch bike rack does not have problems in years.
Conclusion
A hitch mount bike rack does not have to be assembled with any sophisticated equipment or mechanical abilities, it only takes patience and attention to details and once installed correctly a hitch bike rack can be one of the most secure methods of transportation of bikes. You can have a stress free transportation of your bike the first time by knowing your car, following installation procedures and selecting a design friendly to beginners such as those of CRAVOT.
Disclaimer
The information provided in this article, “Hitch Mount Bike Rack Installation for Beginners,” is intended for general informational and educational purposes only. While every effort has been made to ensure accuracy based on hands-on experience and current product knowledge, installation procedures, vehicle specifications, and hitch systems may vary by manufacturer, model, and individual setup.
Always consult your vehicle owner’s manual, the hitch manufacturer’s guidelines, and the bike rack’s official installation instructions before attempting installation. Failure to follow the correct procedures or exceeding the recommended weight limits may result in equipment damage, vehicle damage, personal injury, or violation of local road regulations.